Scenario
Assume you receive product data from a PIM system in this format:
{
   "name": "burton custom freestyle 151",
   "body_html": "<strong>Good snowboard!</strong>",
   "vendor": "Burton",
   "type": "Snowboard",
   "status": 0
 }
But Shopify expects the data in this format:
{
 "product": {
   "title": "Burton Custom Freestyle 151",
   "body_html": "<strong>Good snowboard!</strong>",
   "vendor": "Burton",
   "product_type": "Snowboard",
   "status": "draft"
 }
}
👉 So, we need to:
- Map fields (e.g., name → title)
- Modify values (e.g., format text, convert status)
### Mock Source Data Using Code Runner
To keep things simple, we will simulate (mock) the PIM system response.
* Add a Code Runner step above the Shopify step
* Paste the following code:
response = {
  "name": "burton custom freestyle 151",
  "body_html": "<strong>Good snowboard!</strong>",
  "vendor": "Burton",
  "type": "Snowboard",
  "status": 0
}
📌 This acts as the input data from the PIM system.
### Configure Payload Using Data Hub
* Edit the Shopify step
* Remove the existing payload
* Select the Code Runner step from Data Hub
* The payload will appear as \{{1\}}
#### Add Mock Data
To help DCKAP Integrator understand the expected structure:
{
   "name": "",
   "body_html": "",
   "vendor": "",
   "type": "",
   "status": 0
 }
### Add Mapping
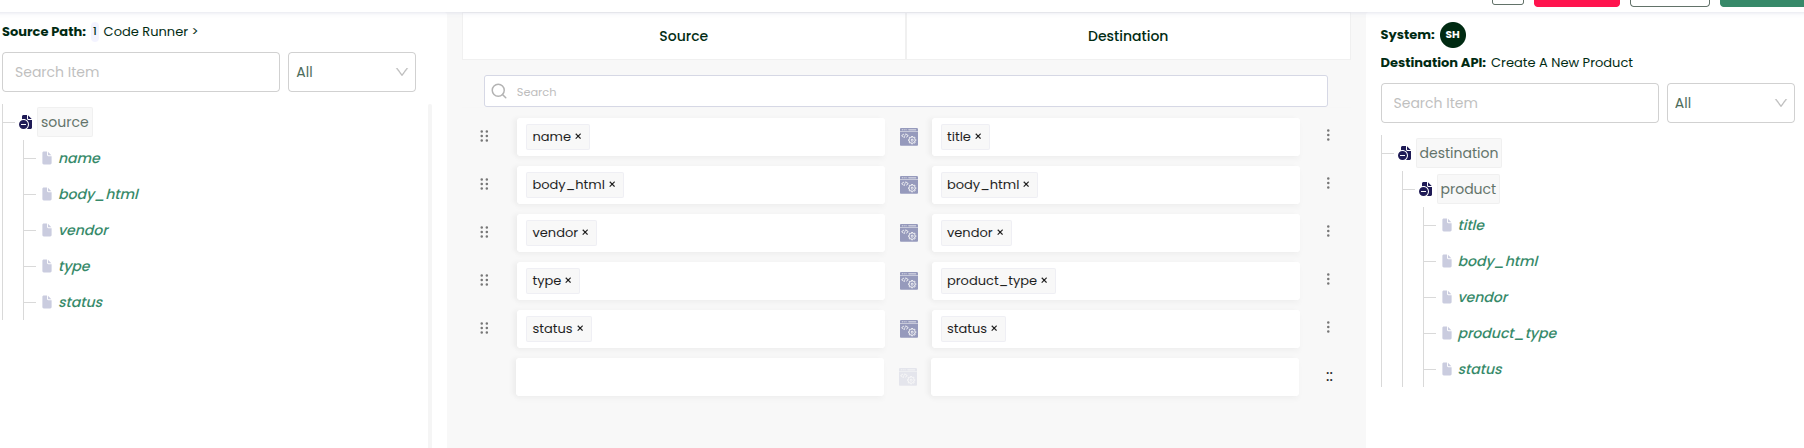
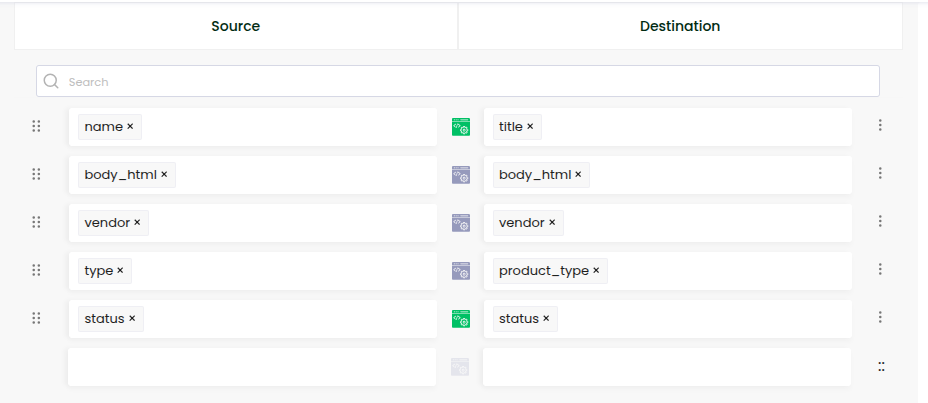
* Click Add Mapping
* You will see:
* Left side → Input fields (from PIM)
* Right side → Required fields (Shopify format)
👉 Drag and drop to map fields:
### Apply Modifiers (Data Transformation)
Modifiers help you transform values during mapping.
\
**Example Transformations**
| Input Field | Input Value | Modifier | Output Field | Output Value |
| ———– | ———————————— | ——————————— | ————- | ———————————— |
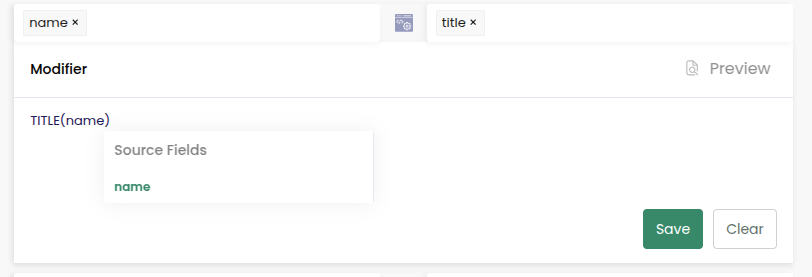
| name | “burton custom freestyle 151” | TITLE(name) | title | “Burton Custom Freestyle 151” |
| body\_html | “\Good snowboard!\” | – | body\_html | “\Good snowboard!\” |
| vendor | “Burton” | – | vendor | “Burton” |
| type | “Snowboard” | – | product\_type | “Snowboard” |
| status | 0 |
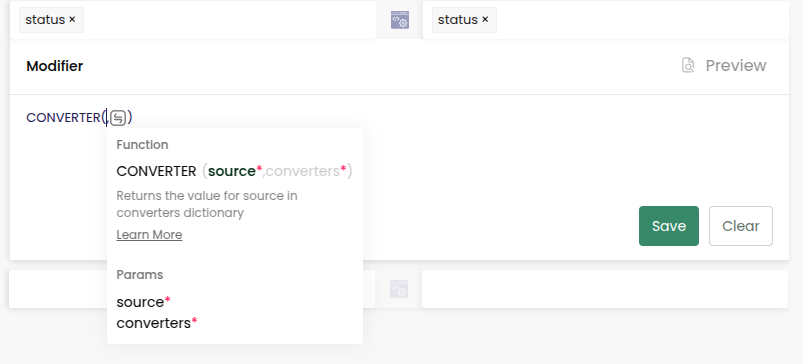
CONVERTER
(status, )
| status | “draft” |
Add modifiers by clicking on the Modifier icon between the source and destination fields.
#### Using Converter Modifier (for Status)
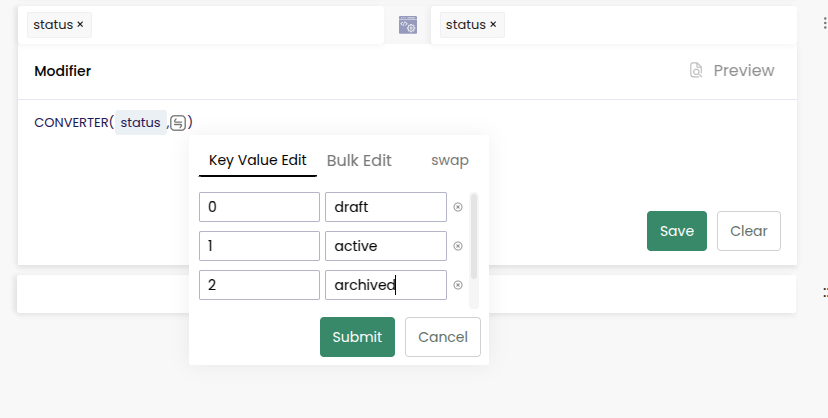
We need to convert numeric status into text:
* 0 → draft
* 1 → active
* 2 → archived
**Steps:**
* Click the modifier icon
* Search for Converter
* Add mappings:
* 0 → draft
* 1 → active
* 2 → archived
* Click Submit → Save
The steps where you have added Modifiers appear in Green.
#### Preview Your Mapping
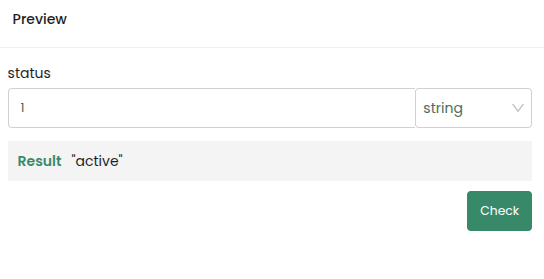
* Open the modifier icon
* Enter a sample value
* Click Check to see the output
### Save Mapping
* Click Save & Exit to return to the workflow
### Run and Verify
* Under Show Output in Console Logs, check Mapping & Modifiers Response
* Save the workflow
* Click Sync Now
* Go to Logs → View Console
Check the final data sent to Shopify via API Request Information and Mapping & Modifiers Response.