### 🧩 Add Your First Step
Head over to the Workflow page.\
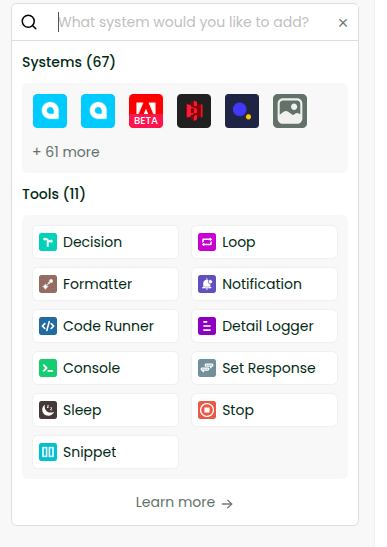
Here, you’ll see options like Tools and Systems—these are building blocks for your workflow.
For now, let’s keep it simple:
* Choose Console under Tools
💡 What is Console?\
Think of it as a place where you can print or log messages—just like a “Hello World” when learning programming.
### ✍️ Configure the Step
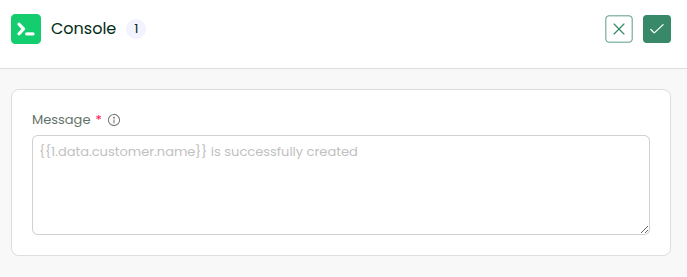
You’ll see a Message field. Enter **My First Workflow** and Click the ✔ (tick icon) to confirm
✅ What you just did:\
You created a simple step that will log a message when the workflow runs.
### 💾 Save Your Workflow
Don’t forget to click Save Workflow. This ensures your setup is stored before running it.

### ⚙️ Enable Console Logs
Now, let’s make sure you can actually see the output.
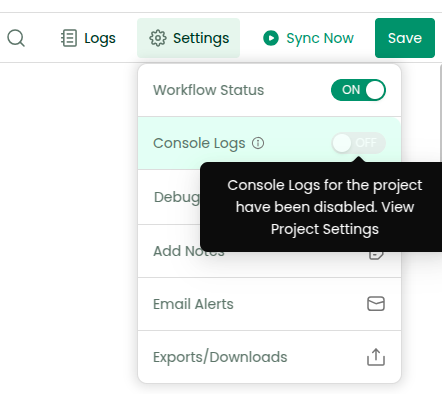
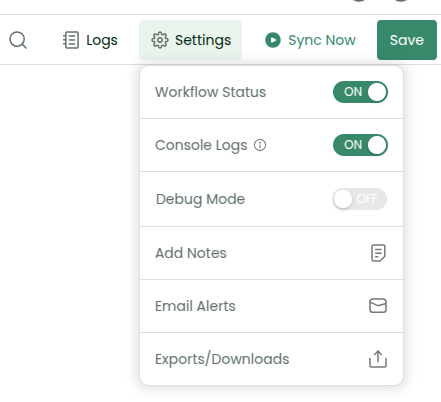
* Click Settings (top right)
* Turn ON the Console Log toggle
⚠️ **Common Situation (One-Time Setup Step):**\
You might see a message saying Console Logs are disabled for the project.
👉 Here’s how to fix it:
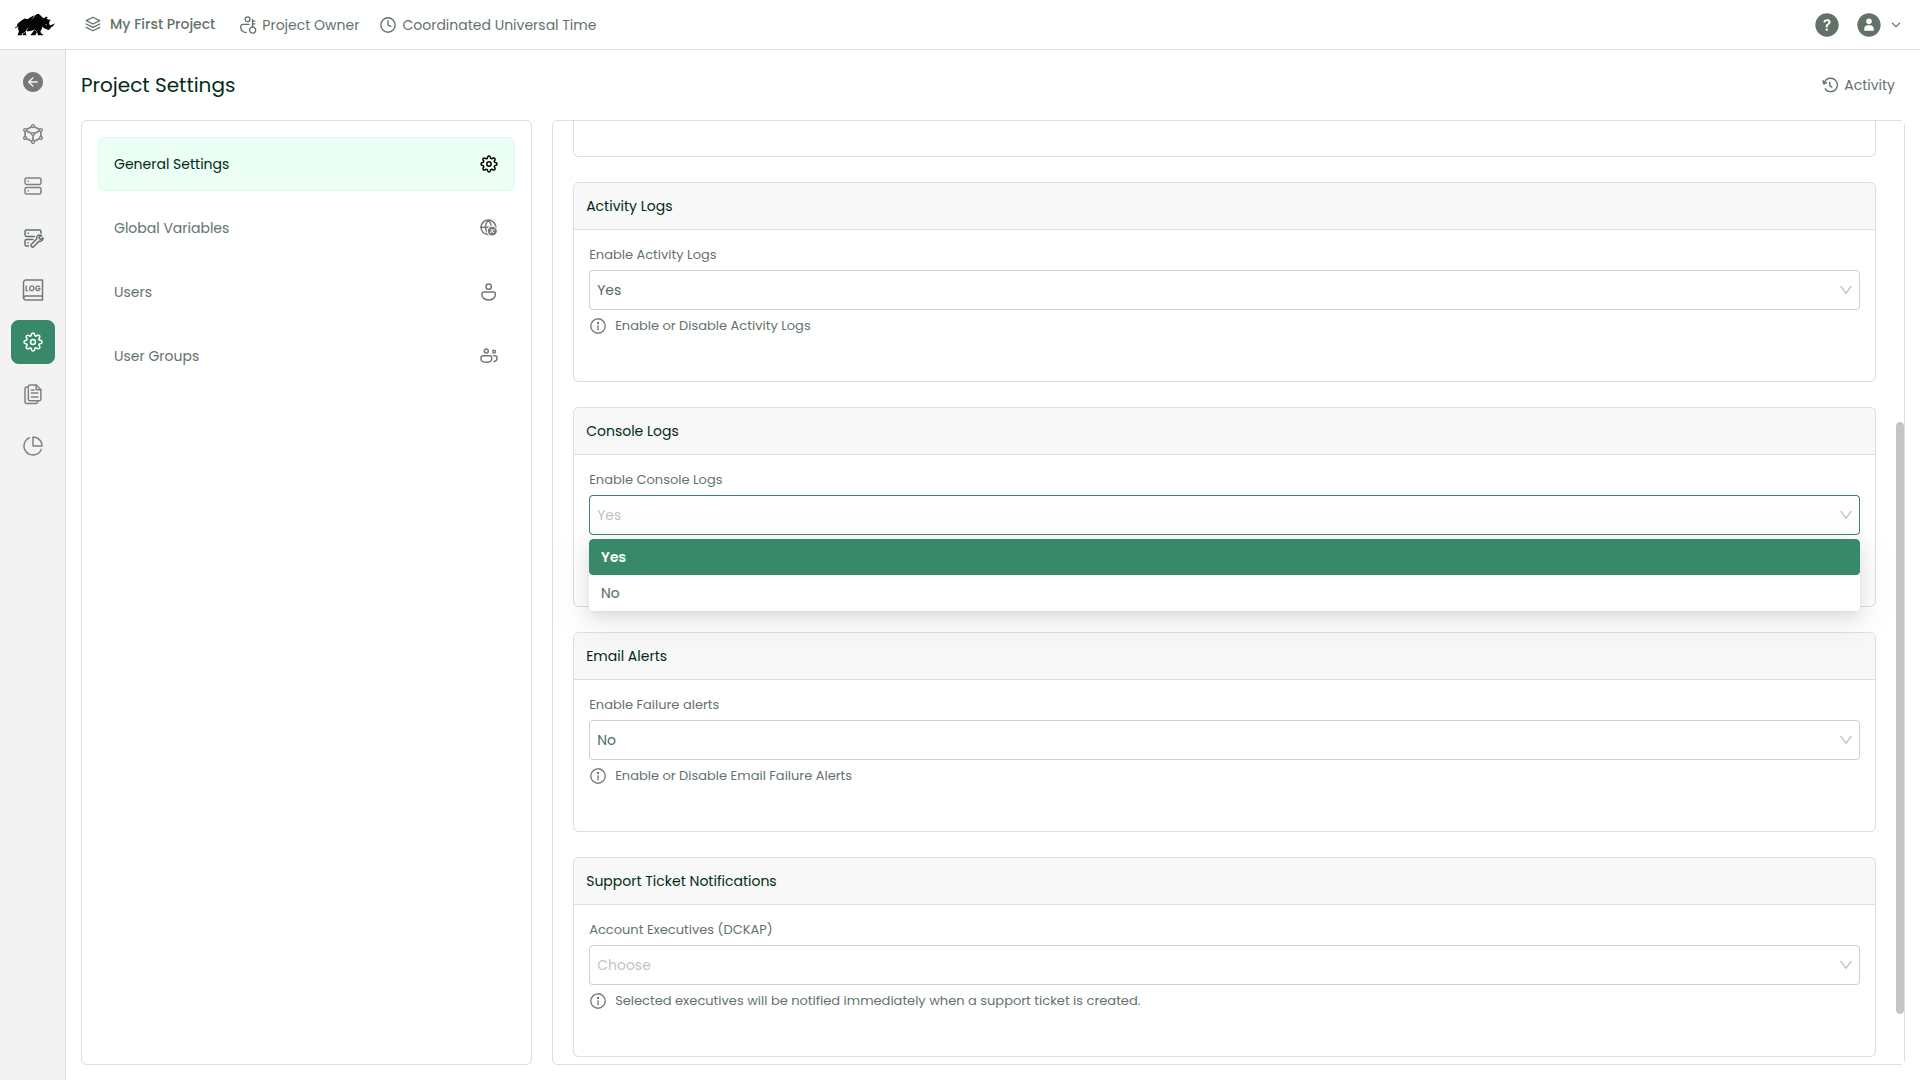
1. Go to Project Settings (left menu)

2. Under General Settings, enable Console Logs by choosing Yes
3. Click Save
\
Now come back to the Workflow Page by choosing Workflows from the left navigation menu and Edit your Workflow. Turn ON the Console Log toggle again in Settings.
### ▶️ Run the Workflow
Click Sync Now at the top right.
#### 🎉 Hooray! You’ve just run your first workflow!
### 🔍 View/Download Your Output
Now let’s check the result. Click View Console.
👉 The button is visible for 10 seconds. Don’t see it now? Click Logs. There, you’ll find the View Console button. Click on it.
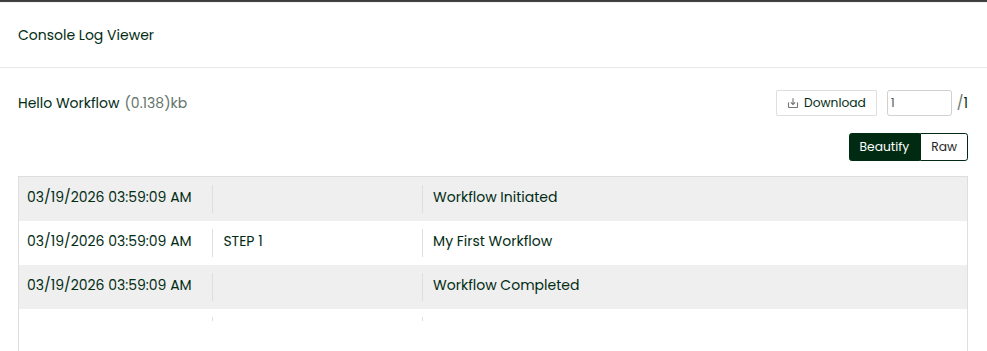
You have the ability to download the log as well.
✅ **What you should see:**\
Your message: “**My First Workflow**” printed in the console.